Setting Up Proxies in Chrome
🔖 Before you begin: Make sure you’ve authorized your IP in the Squid Proxies dashboard.
Chrome Proxy Setup via System Settings
Windows
-
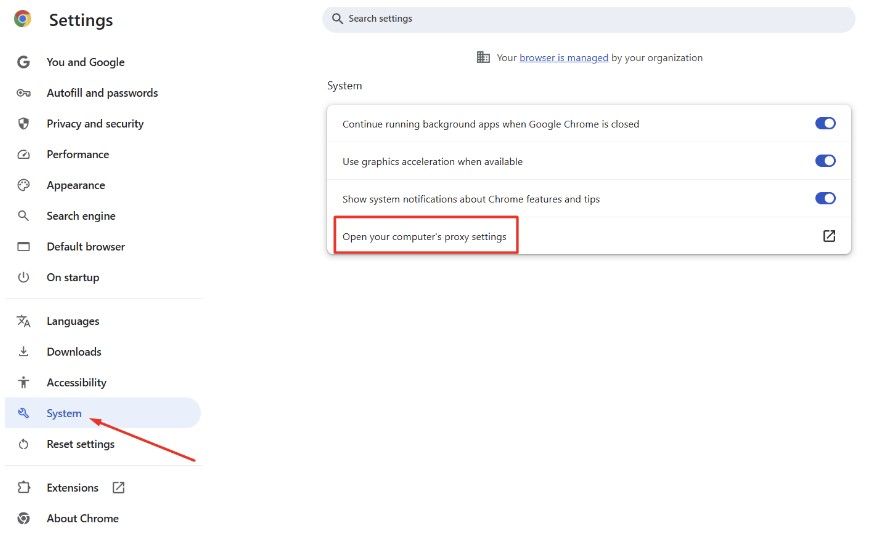
Open Chrome and go to Settings > System.
-
Click Open your computer’s proxy settings.
-
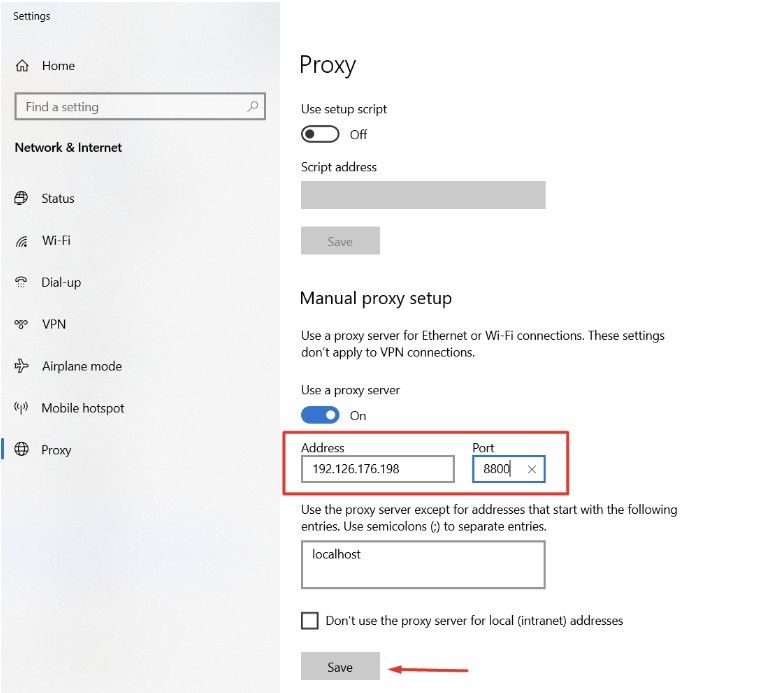
Under Manual proxy setup, toggle the switch to On.
-
Enter your Squid Proxy IP address and port:
- Example:
192.126.176.198:8800 - Click Save.
- Example:
macOS
-
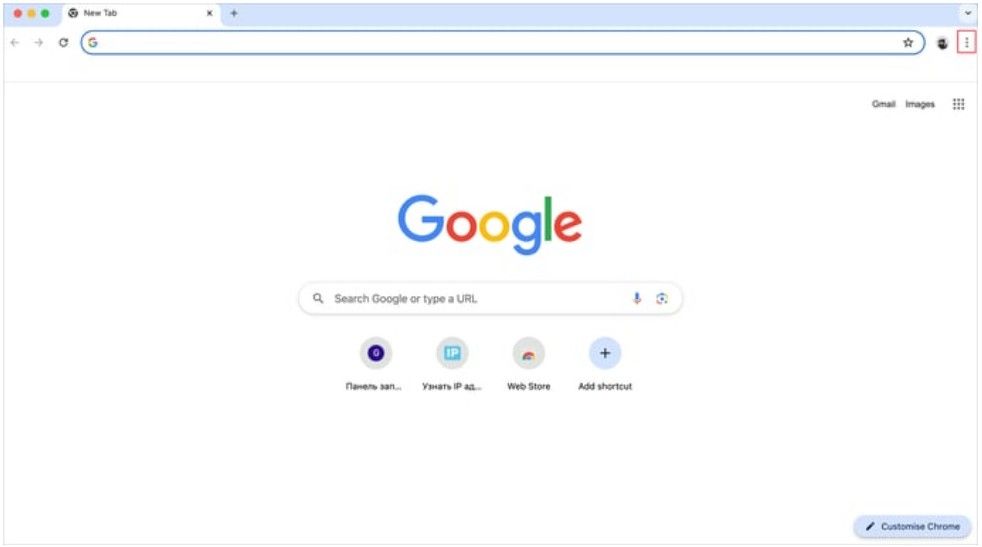
Open Google Chrome and click the (⋮) menu in the upper right corner of the browser window.
-
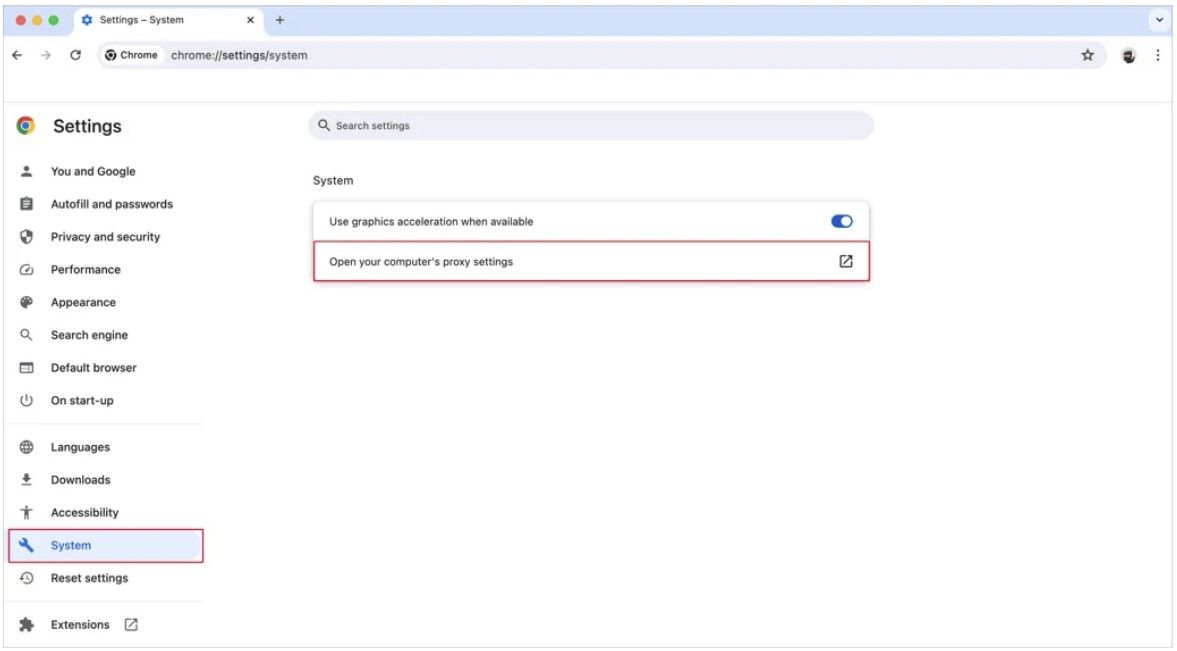
Select Settings > System
-
In the System section, click Open your computer’s proxy settings (this will open your system's network settings).
-
Open the Proxies tab.
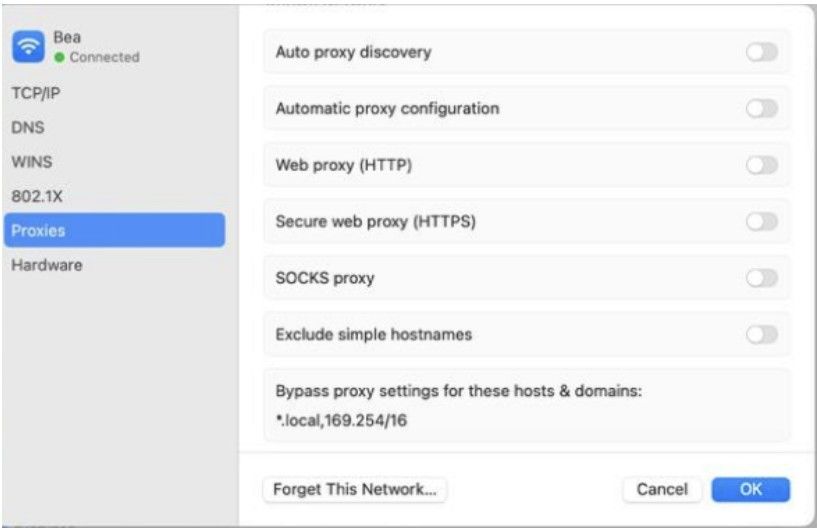
-
Check both Web Proxy (HTTP) and Secure Web Proxy (HTTPS).
-
Enter your Squid Proxy IP and port for both fields.
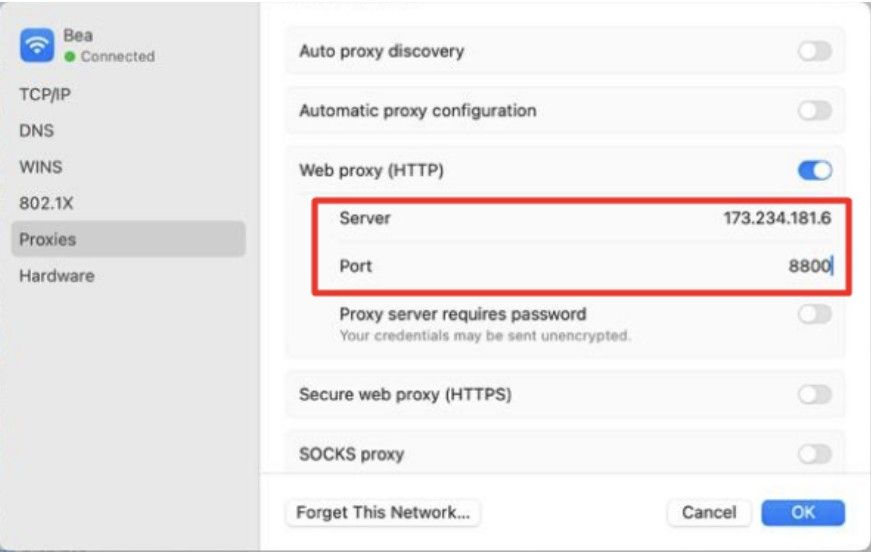
-
Click OK and Apply to save settings.
Proxy Setup via Chrome Extension
For easier switching between proxies or managing multiple profiles:
Using SwitchyOmega:
-
Install Proxy SwitchyOmega 3 (ZeroOmega).
-
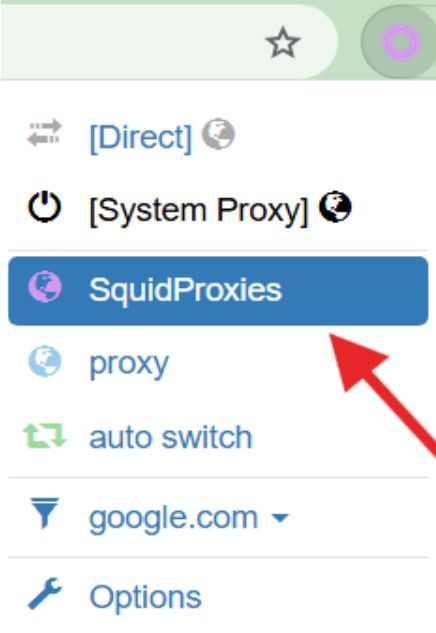
Create a new profile and name it (e.g., SquidProxies).
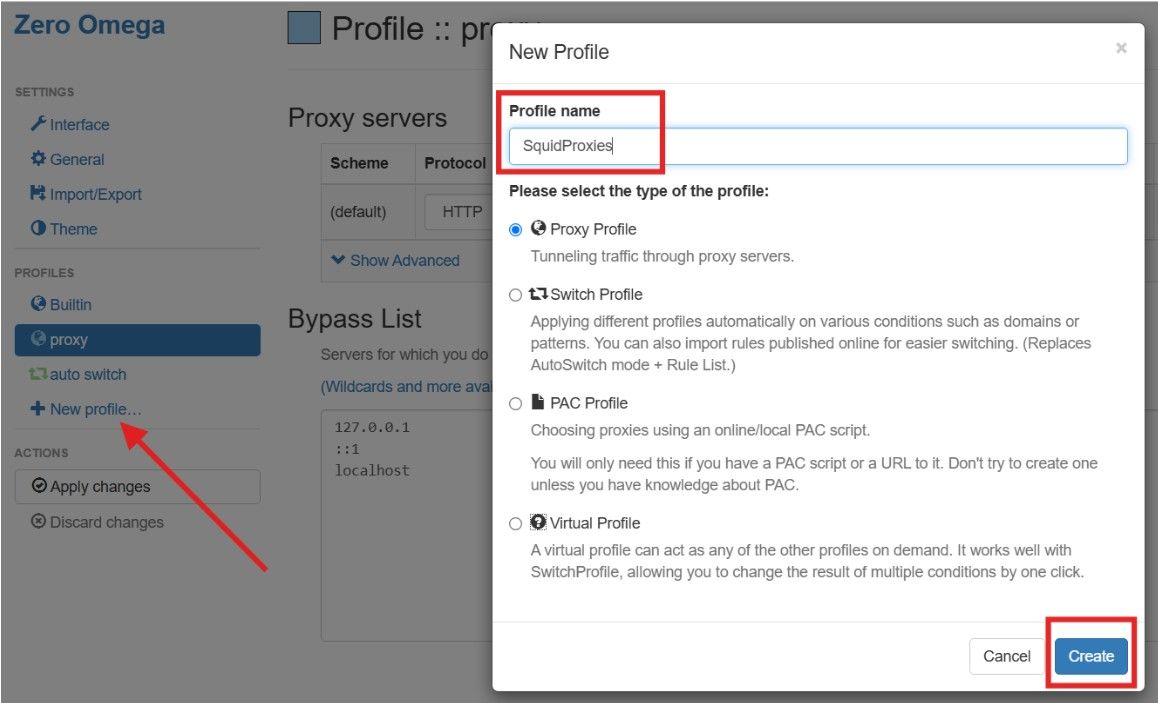
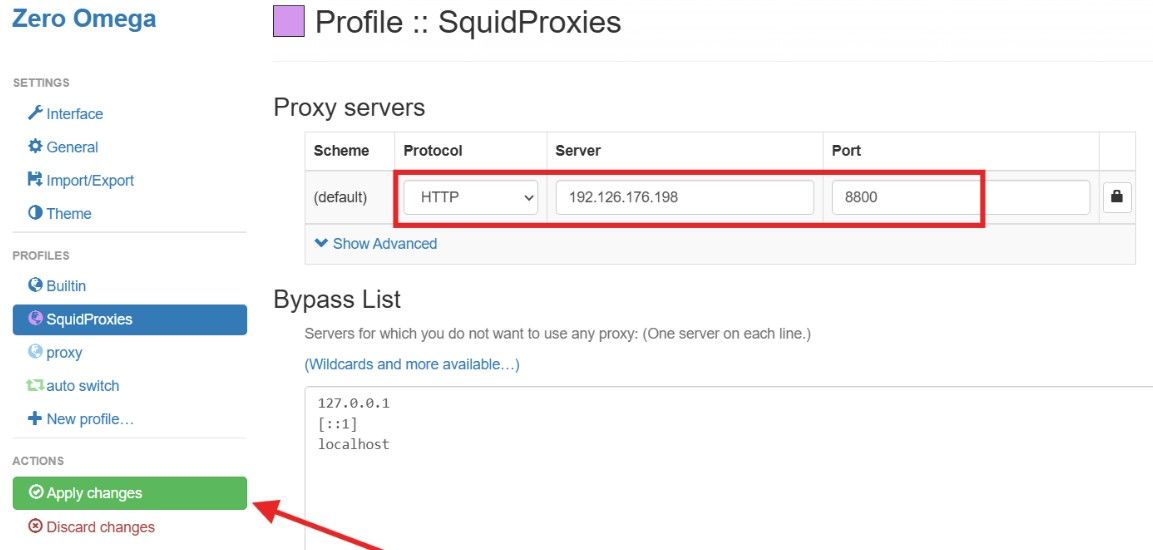
-
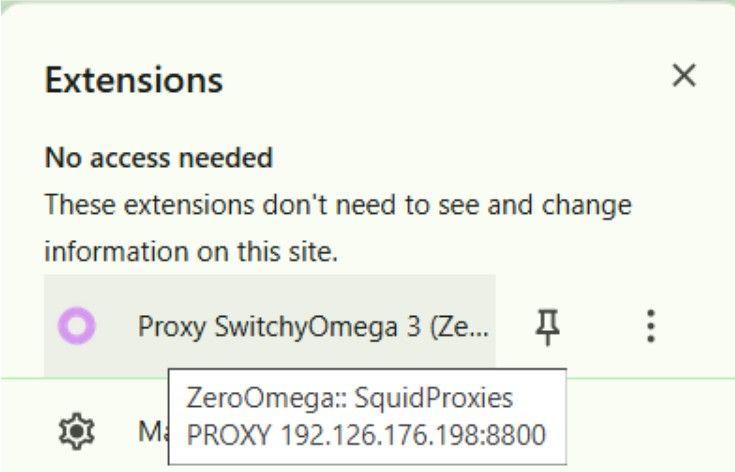
Enter your proxy details in the format:
192.126.176.198:8800 -
Click Apply Changes and activate the profile.
-
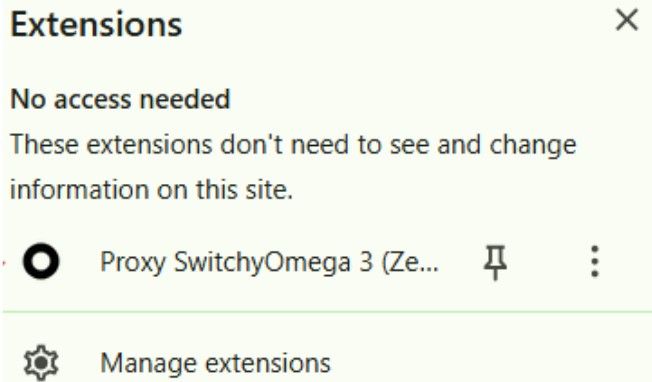
Click the Proxy SwitchyOmega icon again.
-
From the dropdown, select the proxy profile you just created.
-
The extension icon should now turn purple or colored, indicating the proxy is active.
Verify Proxy Connection in Chrome
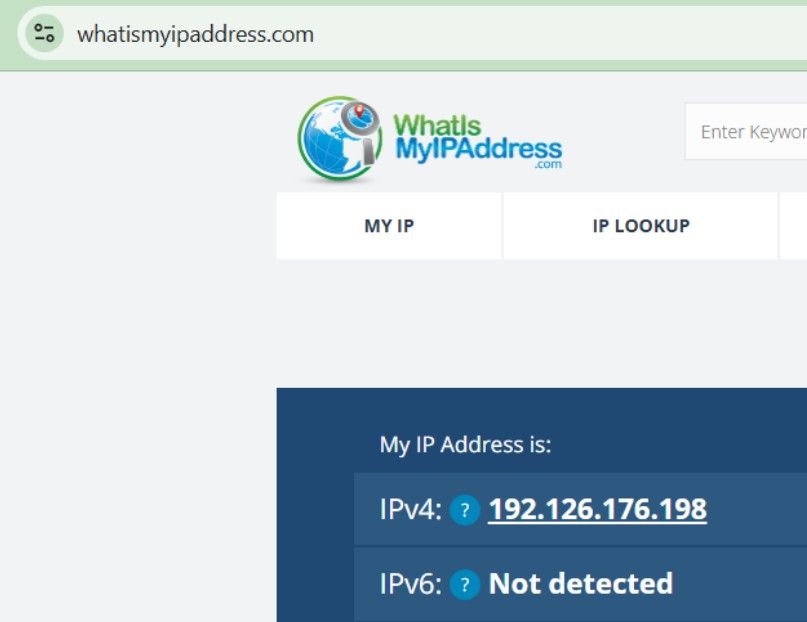
- Open Chrome with your configured proxy.
- Go to https://whatismyipaddress.com or http://ip-check.net.
- Ensure the IP shown matches your Squid Proxies IP.
You might also like: