Setting Up Proxies in Firefox
Unlike Chrome, Firefox has its own built-in proxy configuration, so you don't need to adjust your entire device's settings—just the browser.
Manual Firefox Proxy Setup
-
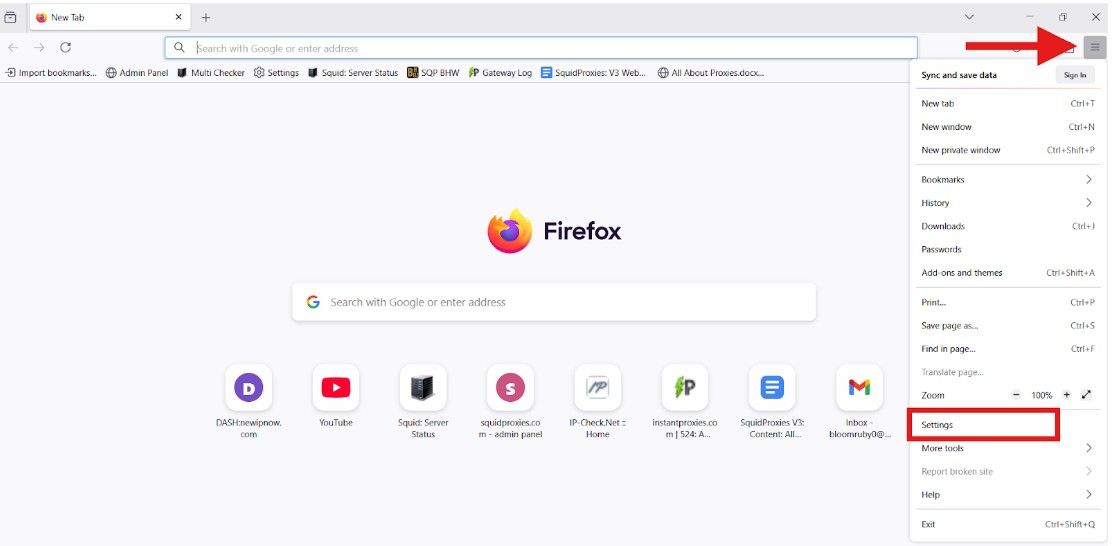
Open Firefox and click the menu icon (☰), then choose Settings.
-
Scroll down to Network Settings and click Settings....

-
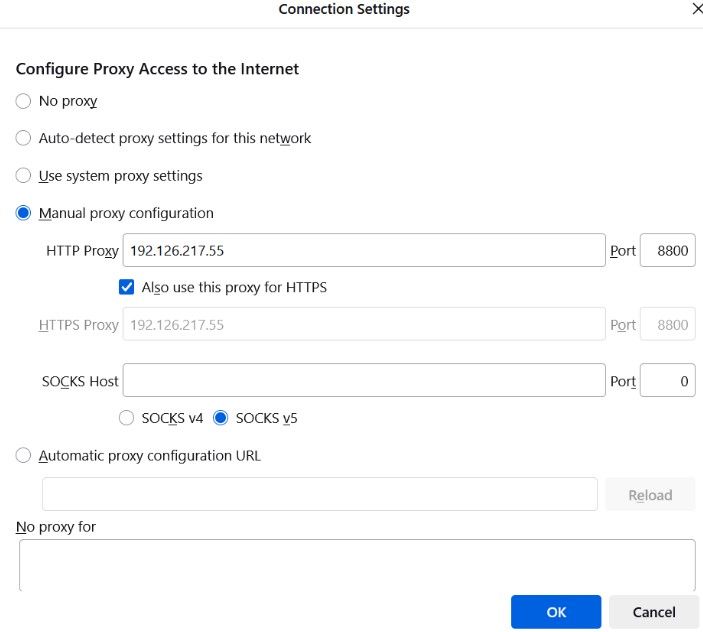
Select Manual proxy configuration.
-
Enter your proxy IP and port under HTTP Proxy.
-
If needed, check Use this proxy server for all protocols.
-
Click OK to save your settings. You’re now connected through your Squid Proxy in Firefox.
Verify Proxy Connection in Firefox
After setting up your proxy, follow these steps to verify it’s active:
- Open a new Firefox tab.
- Go to https://whatismyipaddress.com or http://ip-check.net.
- Compare the IP address shown on the page with:
- Your real IP address (without the proxy)
- The proxy IP assigned by Squid Proxies
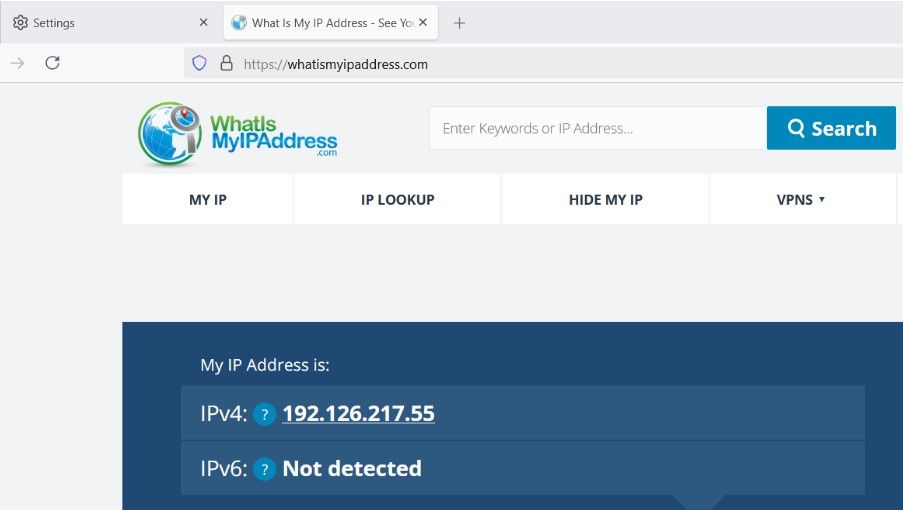
If the IP address displayed matches your Squid Proxy IP (and differs from your real IP), then your proxy is working correctly.
📌 Note: If you're using a residential proxy with rotating IPs, the IP may change frequently depending on your session or port rotation rules.
More Guides: