Setting Up Proxies in Safari
This guide walks you through each step, including how to verify your proxy is working.
Safari Proxy Setup on macOS
-
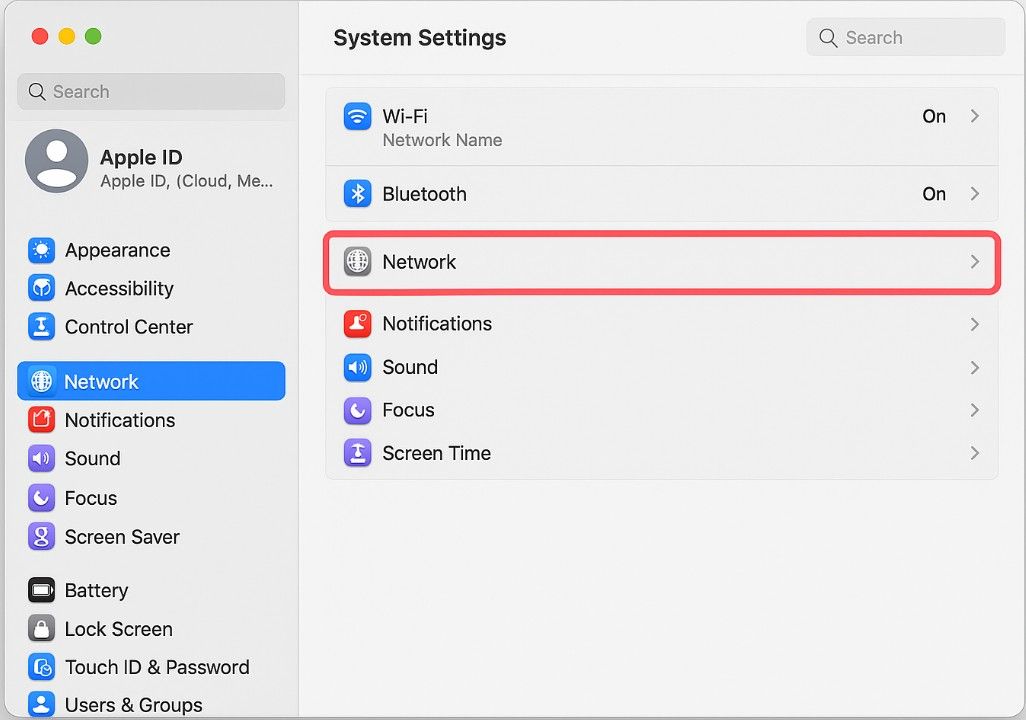
Open Safari, then click the Apple menu in the top-left corner of your screen and choose System Settings (or System Preferences, depending on your macOS version).
-
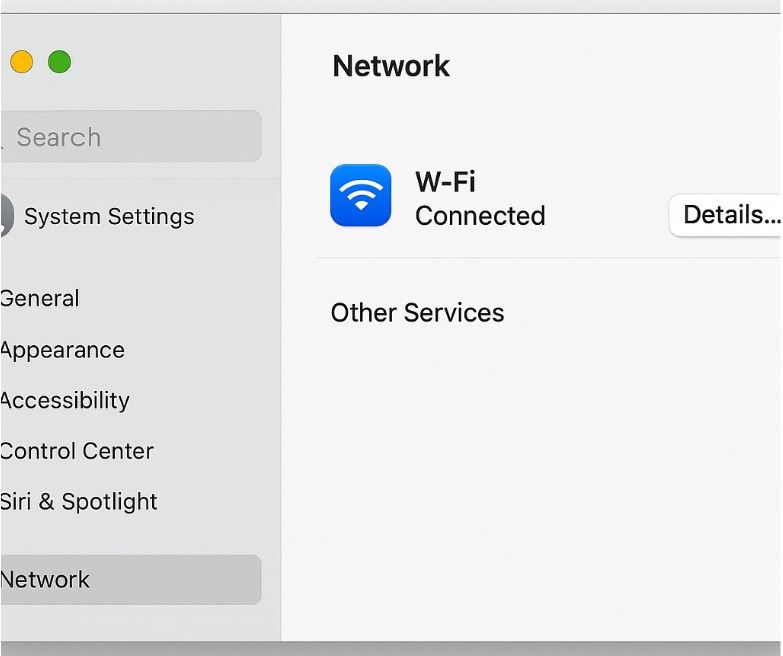
In the sidebar, click Network, then select your current network connection—usually Wi-Fi if you're using a wireless connection.
-
Click the Details (or Advanced) button next to your selected connection.
-
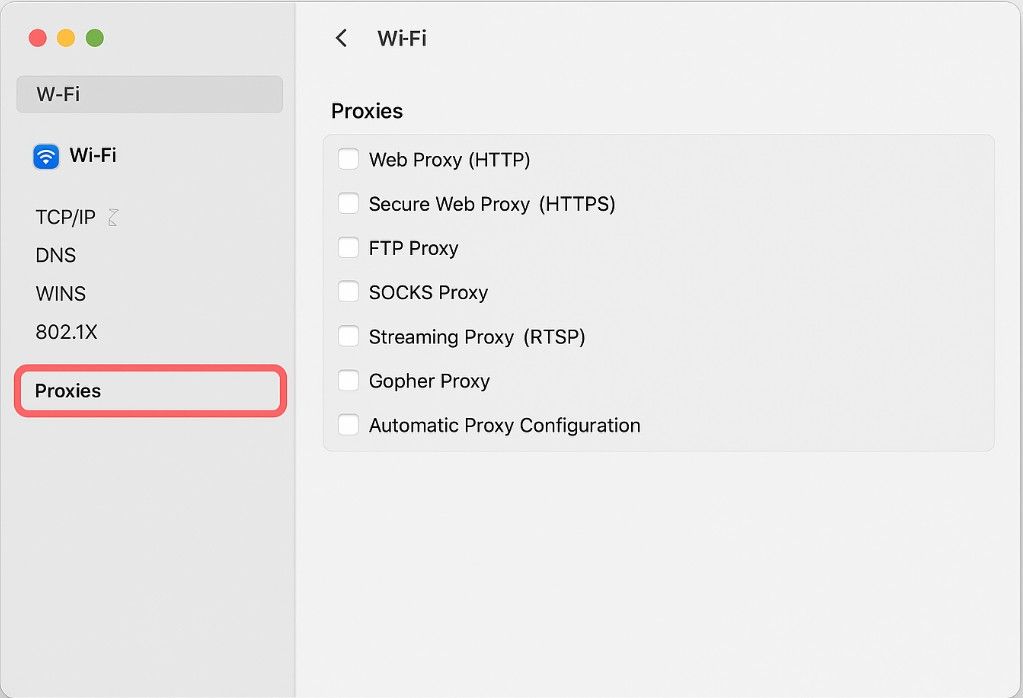
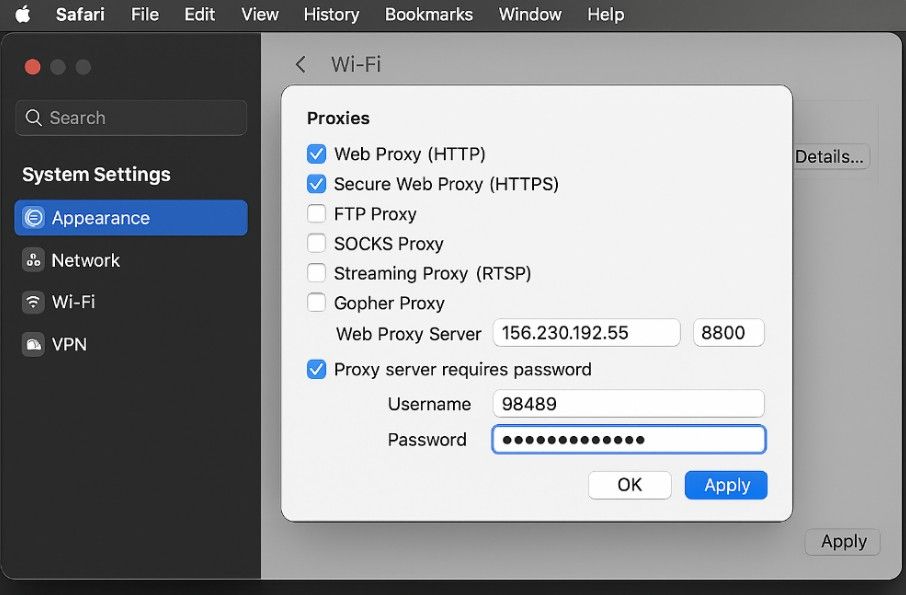
In the new window, navigate to the Proxies tab.
-
You’ll see several options. To use Squid Proxies:
- Check Web Proxy (HTTP) if your proxy supports HTTP.
- Check Secure Web Proxy (HTTPS) if your proxy supports HTTPS.
-
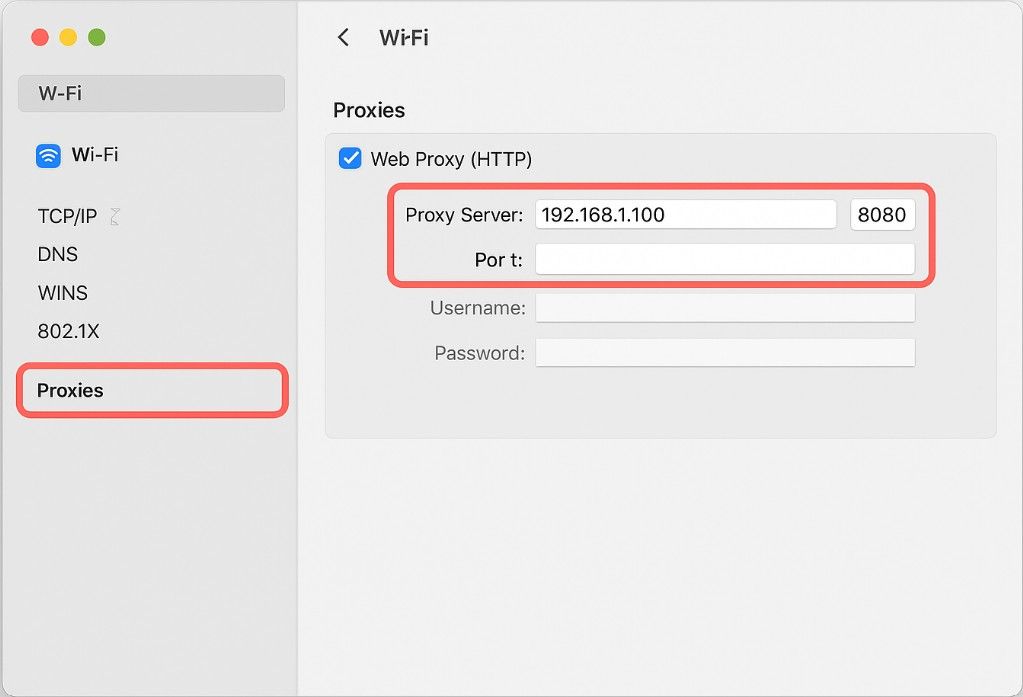
Enter the Squid Proxy IP address and the correct Port number in the fields next to the selected protocol(s). These details can be found in your Squid Proxies dashboard.
-
If your proxy requires authentication, check the box labeled Proxy server requires password, then input your Squid Proxies username and password.
-
Once everything is entered correctly, click OK, then click Apply to save the changes.
Safari will now route your browsing traffic through the configured Squid Proxy.
📌 Note: These proxy settings apply to all macOS applications that use system networking—not just Safari. If you need to proxy Safari only, consider using a third-party proxy manager.
**Verify Proxy Connection in Safari **
After setting up your proxy, it’s a good idea to confirm that it’s functioning properly. Here’s how:
-
Open a new tab in Safari.
-
Visit a site that shows your public IP address, like http://ip-check.net or https://whatismyipaddress.com.
-
Check the IP address shown. If it differs from your actual IP and matches your Squid Proxy (or appears from a different region or ISP), your proxy is working.
-
If the site prompts you for a username and password, enter the authentication details provided by Squid Proxies.
-
If the IP has not changed, revisit the steps above and make sure everything—IP, port, and authentication—is entered correctly.
More Guides: